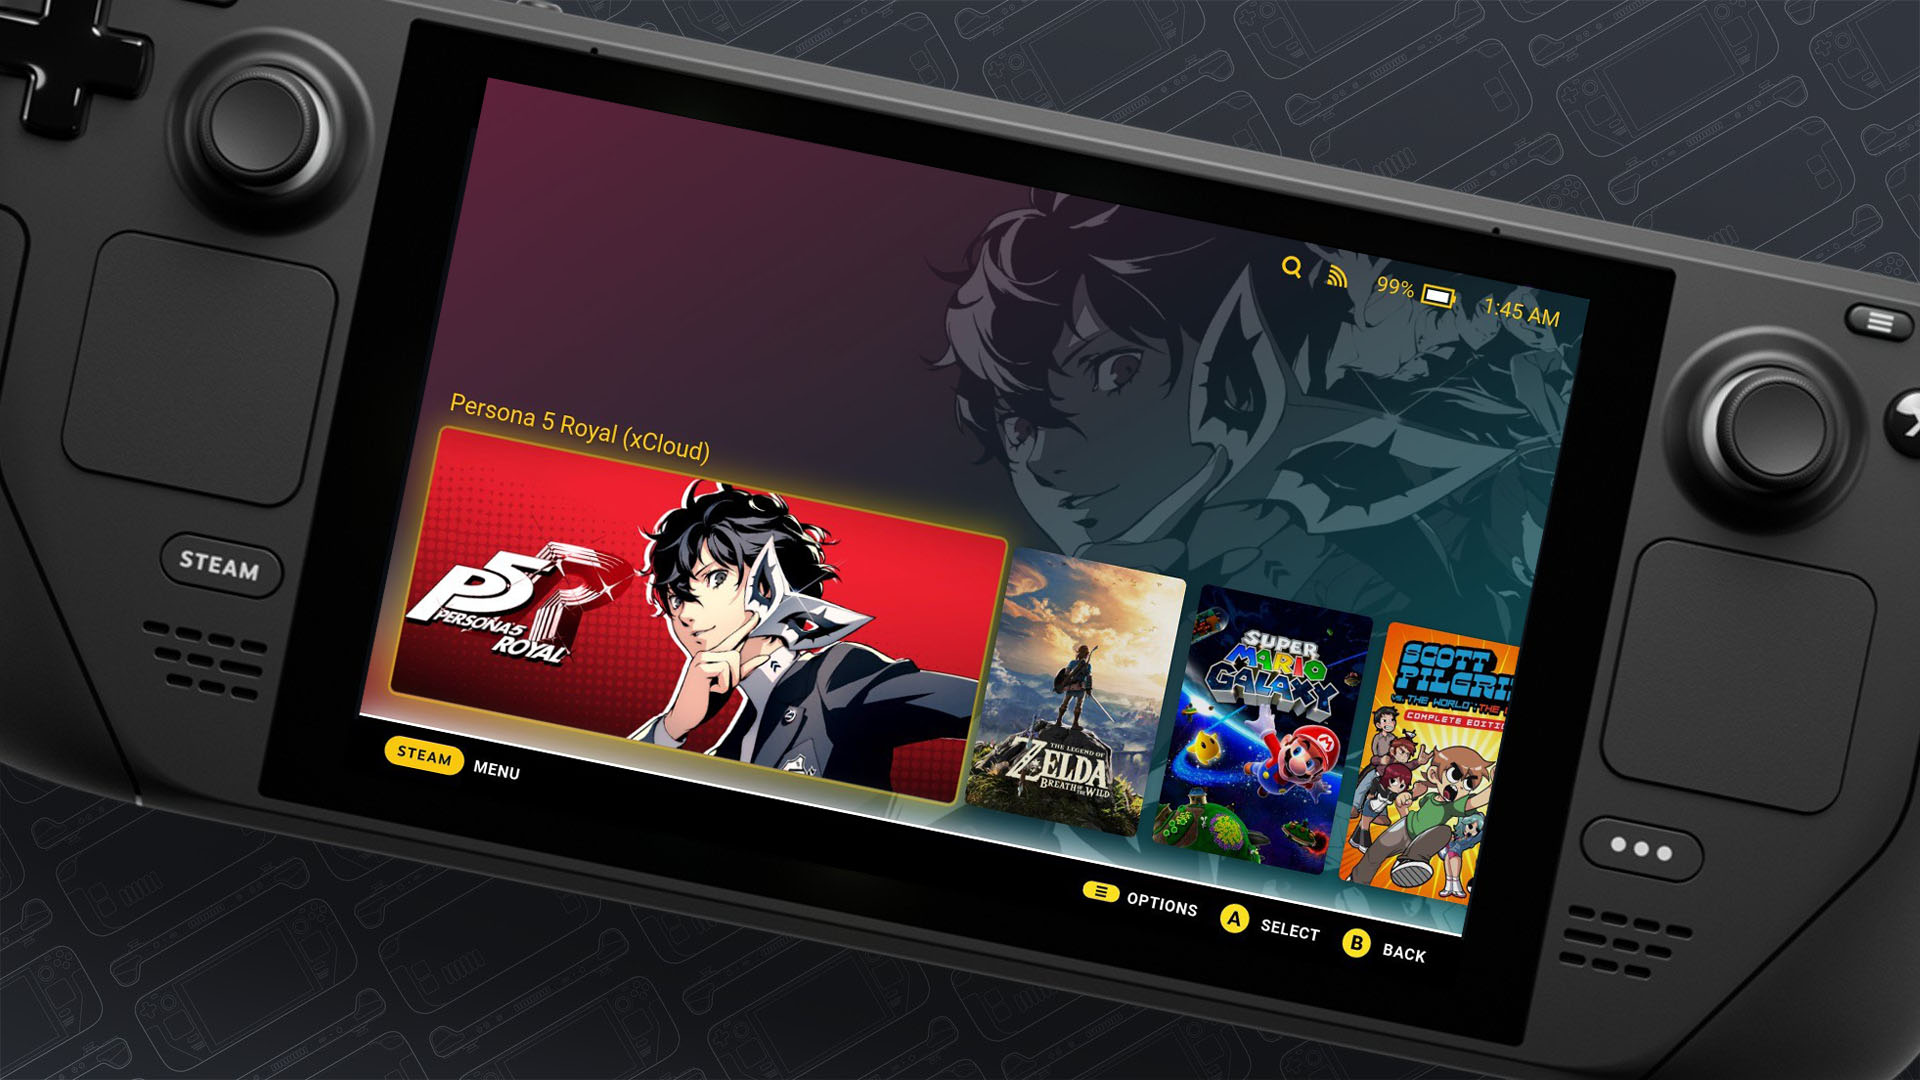
On (X) Cloud Nine...
So let me guess. You’re an XBOX Game Pass subscriber and a Steam Deck owner? You know the basics of how to launch the client through SteamOS and love the accessibility of Xcloud’s user friendly navigation? But you want to take it a step further and possibly cherry pick titles from the cloud service and add them to your Steam Deck’s frontend to make them look, and feel like the rest of your SteamOS library? Well, it’s easier than you might think. In similar fashion to how one would integrate Xcloud to the Steam Deck, launching a title from the services gargantuan list is possible with a few short steps.
Now this assuming you already don’t have Edge installed, nor have Xcloud already up and running on your device. From SteamOS, Press down on the STEAM button, select Power > Switch to Desktop. Once you’ve booted into the Deck’s Linux OS, select Discover: Software Center on your taskbar.
In the application, search for “Microsoft Edge” and install the browser.


Once the installation is complete, close out the Software Center and click on the Application Launcher (commonly known as the Start button on the task bar), then select Internet, then highlight Microsoft Edge, right click (L2 Bumper) the application and select Add to Steam Library.
From here, launch Steam from the desktop and find Microsoft Edge in your Library. Right click the application and click Properties.
Once you’re in the app’s in-Steam properties, Change the name of the app from Microsoft Edge to whichever title you’re looking to add to your SteamOS Library from Xcloud, in this example I’ll be using Persona 5 Royal. Once you’ve done this, scroll down to Launch Options, and make the following appendage to the path provided. Before pasting or manually inputting the code below, make sure there is a space after the last “@”.

--window-size=1024,640 --force-device-scale-factor=1.25 --device-scale-factor=1.25 --kiosk "REPLACE WITH GAME URL FROM XCLOUD & LEAVE QUOTATION MARKS"
You will notice in that last part of the code provided above, I’ve instructed you to replace the text with the direct link to the title. The way to get the link itself is by visiting XBOX.com/play via your Steam Deck or PC (Preferable), logging into the service, then selecting the title and launching it. If a window pops up saying that a controller was undetected, just click Continue Anyway. Wait until the game has booted, then copy the URL in the address bar, replacing the text in-between the quotation marks. The complete code should look like the following;
--window-size=1024,640 --force-device-scale-factor=1.25 --device-scale-factor=1.25 --kiosk "https://www.xbox.com/xx-XX/play/launch/persona-5-royal/XXXXXXXXXXXX"
Make sure these changes are made, then exit or minimise Steam. Now head back to the desktop and press the Application Launcher (Start), select System > Konsole. A terminal will pop up where you will need to paste or manually input the following code;
flatpak --user override --filesystem=/run/udev:ro com.microsoft.Edge
Press Enter, then close Konsole.

Now launch Return to Gaming Mode and wait for SteamOS to boot up. Once the unit reboots, press the Steam button, and select Library. Scroll to Non-Steam games (you can do this by pressing the R1 shoulder button to scroll through different categories), then select the game you just added.
Don’t launch it just yet, but on the right side, select the controller icon, then edit your Current Layout. You will see an option right at the top that says “Gamepad With Joystick Trackpad”. Select this button then change this to Gamepad with Mouse Trackpad. Once you see the setting changed, back out by pressing “B”, and launch the app.
Happy (Cloud) Gaming!

Now, things have changed since the release of Decky Loader, allowing Deck owners to seamlessly download assets directly through a plugin. You can go as far as personalising your SteamOS Dashboard to adding background music that makes the unit sound like PSVITA. Follow our comprehensive guide to installing Decky Loader by clicking here, then from the its app store, Install SteamGridDB. An extra selection will become available from the respective title’s OPTIONS, which can be viewed by highlighting the game and pressing down the “Start” button (≡) then selecting Change Artwork.
Be sure the title is named appropriately (again using Persona 5 Royal as its example, name the game “Persona 5 Royal” from Desktop Mode as instructed at the very beginning of Step 3). The tool will scrape multiple images for you to attach to the game including box art, banner art, hero art, a logo and icon. Once you’ve applied each image to your preference, back out to the SteamOS dashboard to view it from your Library.
If you want to make an addendum to the game’s SteamOS title, be sure to return to Desktop Mode, open Steam, select the game and open its properties, then add or rename it however you like. As shown in the example image provided above, I went ahead and added “(Xcloud)” to the end of Persona 5 Royal, to show that the game was indeed an Xcloud title. You cannot rename it from SteamOS, or the game will not boot.
Hope this guide has helped you. Enjoy!

