Heading back to base...
So you installed Windows on your Steam Deck, and it’s not the right fit for you. What do you now? How do you revert to SteamOS? Well, I’m going to show you the steps I took to do so. While I tested Windows 10 and Windows 11 on the Steam Deck, I just felt it wasn’t ready for the platform, whether that be a Windows problem or Valve problem remains to be seen. I do know that Windows are already looking into developing a storefront for the Microsoft Store on the Steam Deck which is a major positive, however we may never actually see it. So the advantage of Non-Steam games without third party support attached comes into question. Regardless, you’re here for a reason, that being of course to re-install SteamOS back onto your deck. While the Windows process was kind of complex, the good news is the SteamOS installation process is definitely streamlined, and why wouldn’t it be? It’s made for the unit itself. There may be a hurdle, but that’s a small caveat that comes with new tech, but I’ll guide you through any supposed mishaps through this step-by-step process.
- A USB Stick with at least 8GB of Storage.
- The official Steam Dock or a USB-C Multiport adapter compatible with the Steam Deck.
- The official SteamOS: Steam Deck Image ISO. (format will be .img.bz2)
- Rufus for Windows.
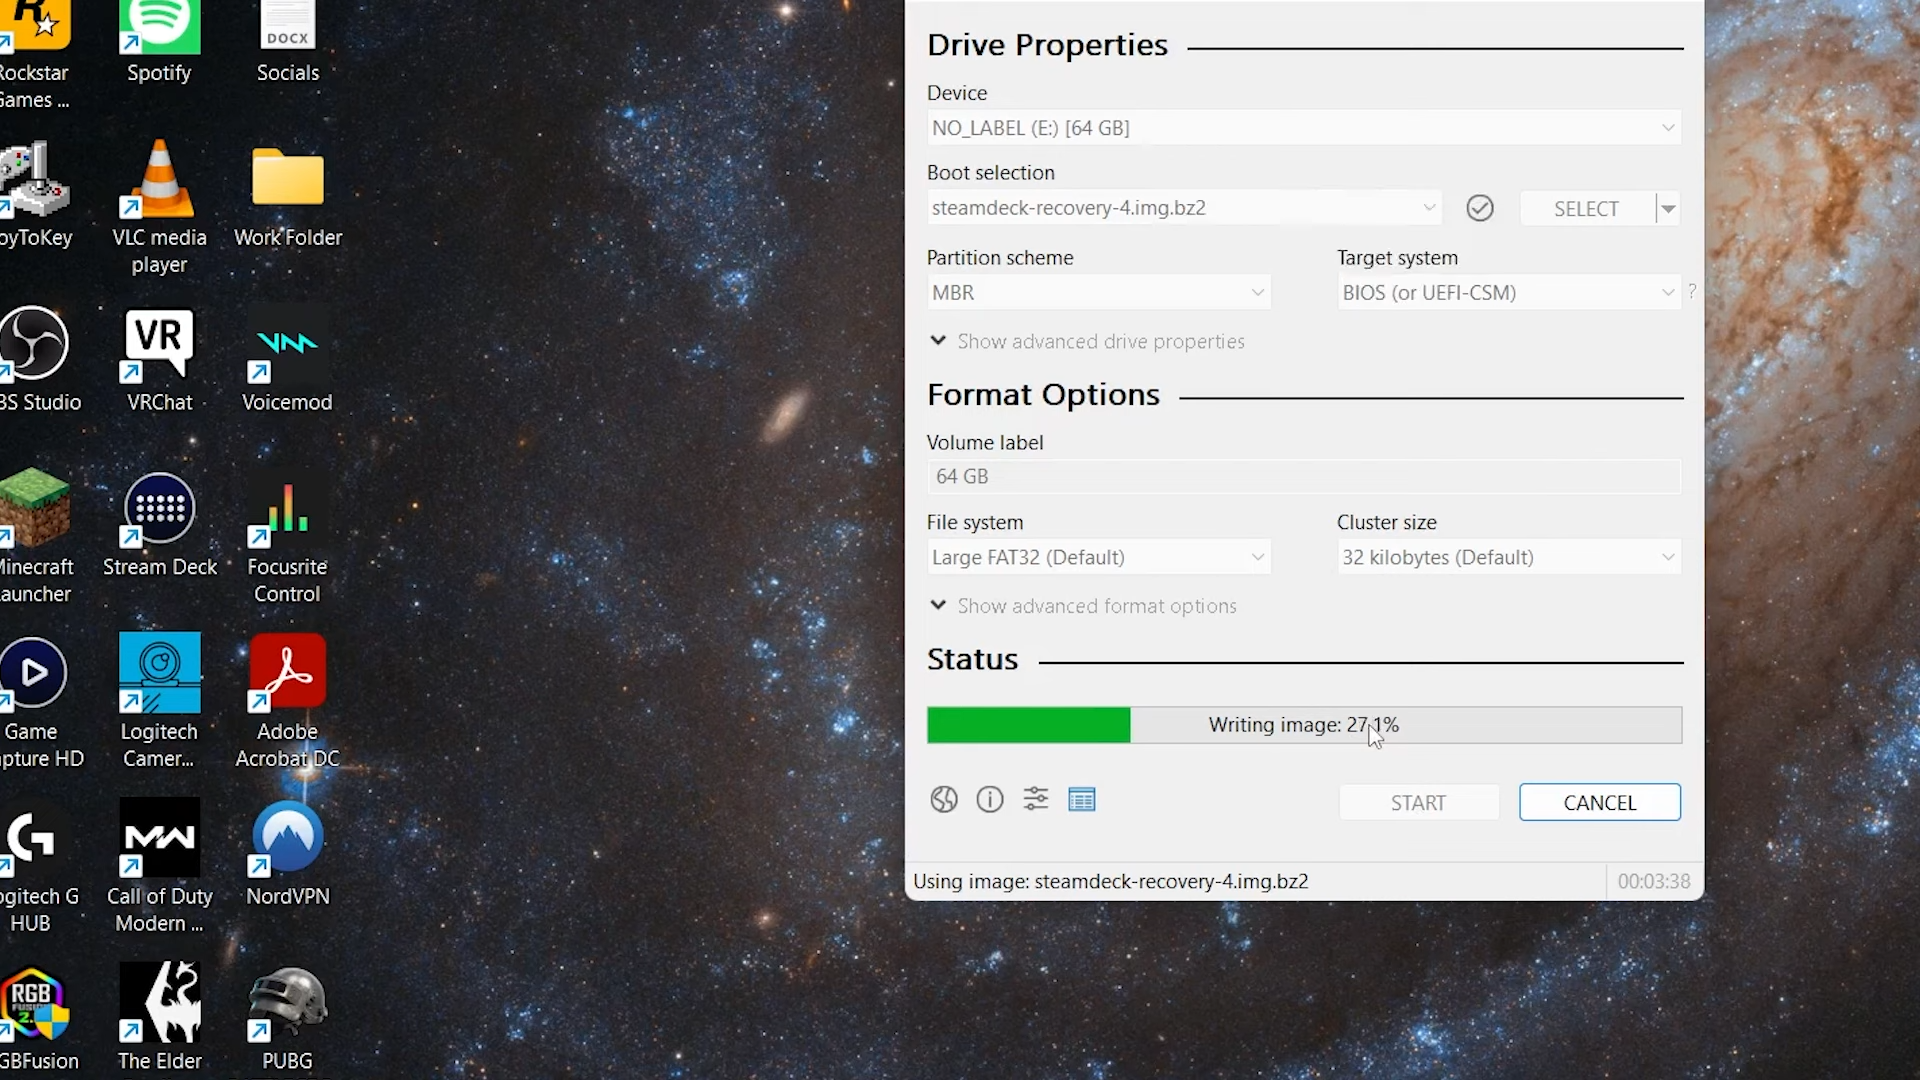
Go ahead and download the SteamOS ISO image from the link provided above, along with Rufus for Windows. Open Rufus and under “Device”, select your USB Flash Drive you want to use and double check that it’s the right one – REMINDER THAT ONCE YOU FLASH STEAMOS TO YOUR USB, IT WILL WIPE YOUR FLASH DRIVE. BE SURE TO BACK ANYTHING ON THERE YOU MAY NEED BEFORE CONTINUING. Now under “Boot selection”, browse to the where “steamdeck-recover-X.img.bz2” is located and select it. After this, simply click START and let the program do its thing. Once it hits 100% Close our Rufus, and remove your USB Flash Drive from your PC.
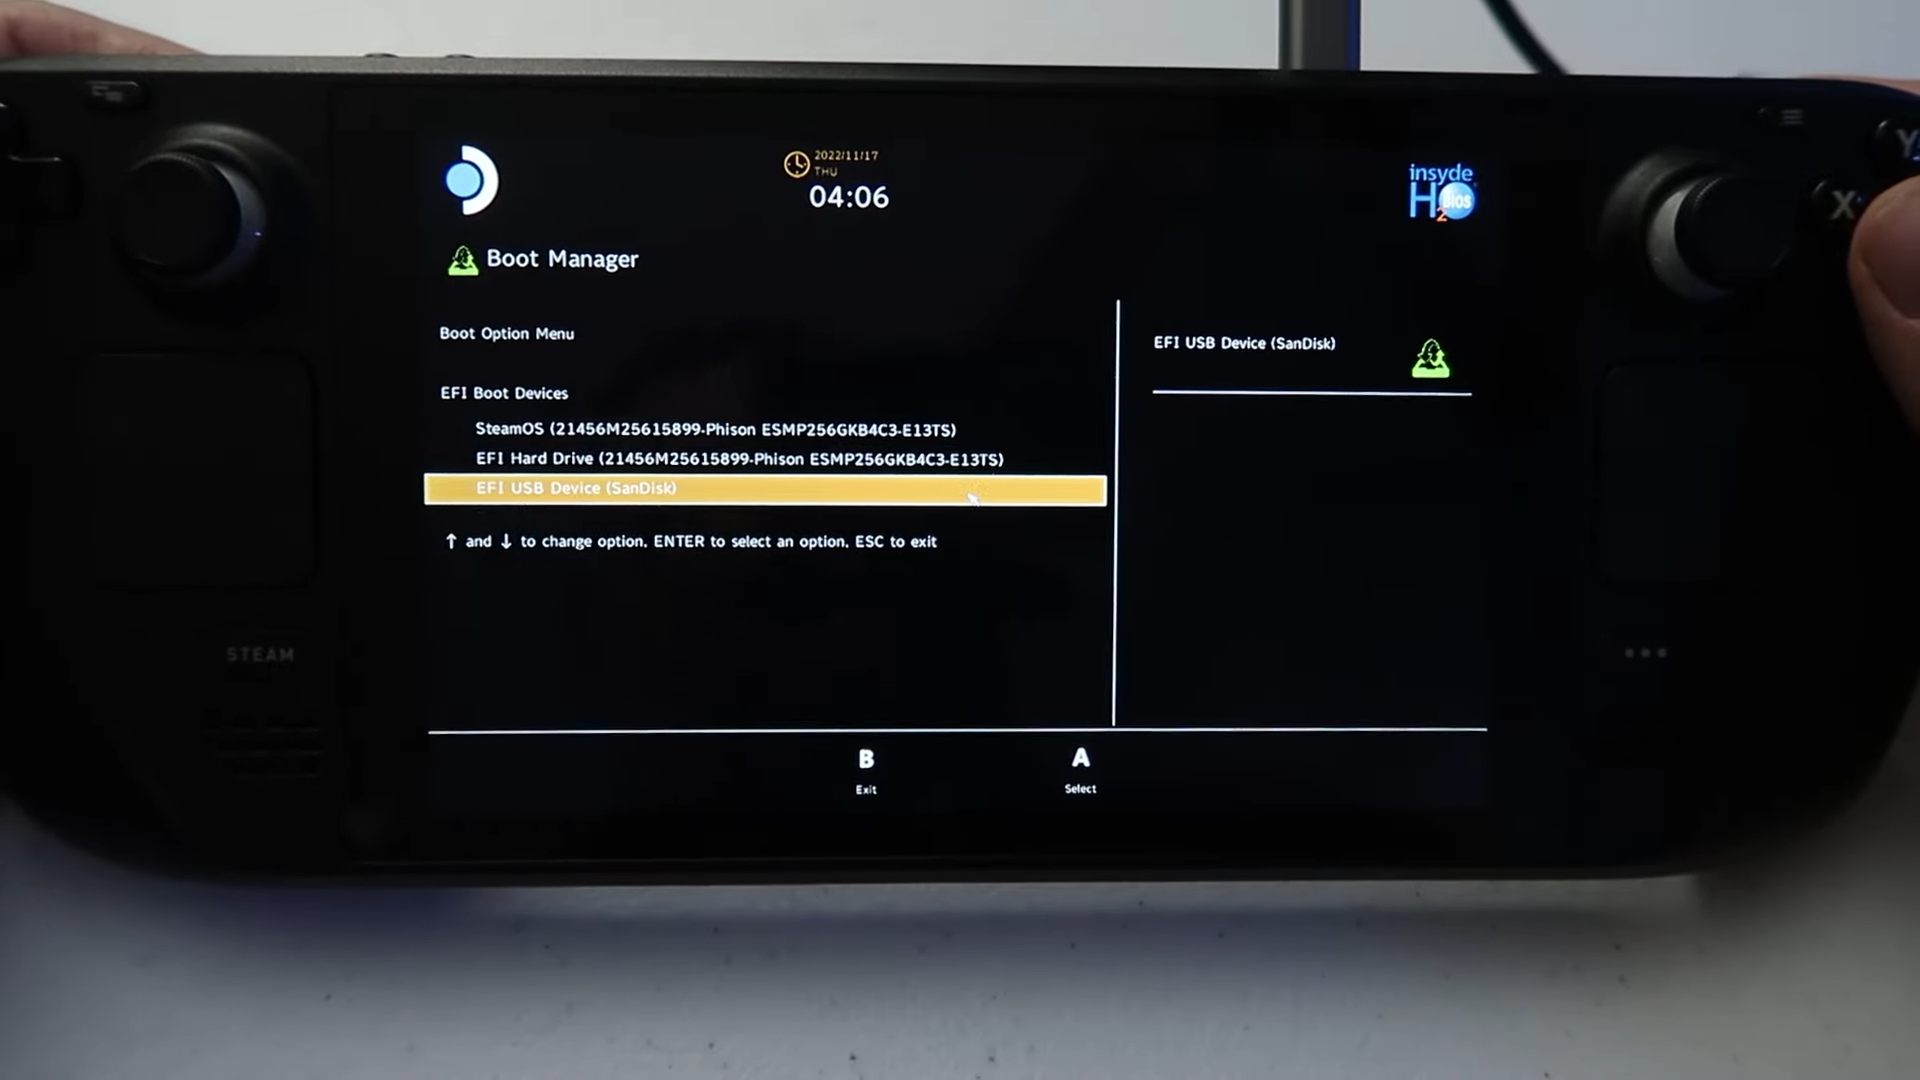
I’ll preface this once again by stating that this process will wipe your Deck. It will not carry over pre-existing installations of titles from Windows to SteamOS. So now that you know this and want to continue, Shutdown your Steam Deck until the screen goes entirely black. Dock your Steam Deck or plug in the USB-C Multiport Adapter, and plug in your USB stick. Hold down the Volume Up (+) button atop the unit, and press power on like you would booting up the Deck. This will take you into the Deck’s BIOS, where you will press Right on the Steam Deck’s D-PAD then press “A” to select Boot Manager. This will show a list of boot devices, but be sure to select your USB Stick that has SteamOS installed on it. It should look something like the image above – EFI USB Device (Brand Name). Once you select the drive, it will take you to a Linux based Desktop where you need to double tap (with your finger or rubber stylus) on “Re-Image Steam Deck” to begin the setup process. You will get two command windows pop-up, but just let them do their thing. Once their complete, your Steam Deck will reboot and begin the front end installation of SteamOS which will take around thirty minutes or so.
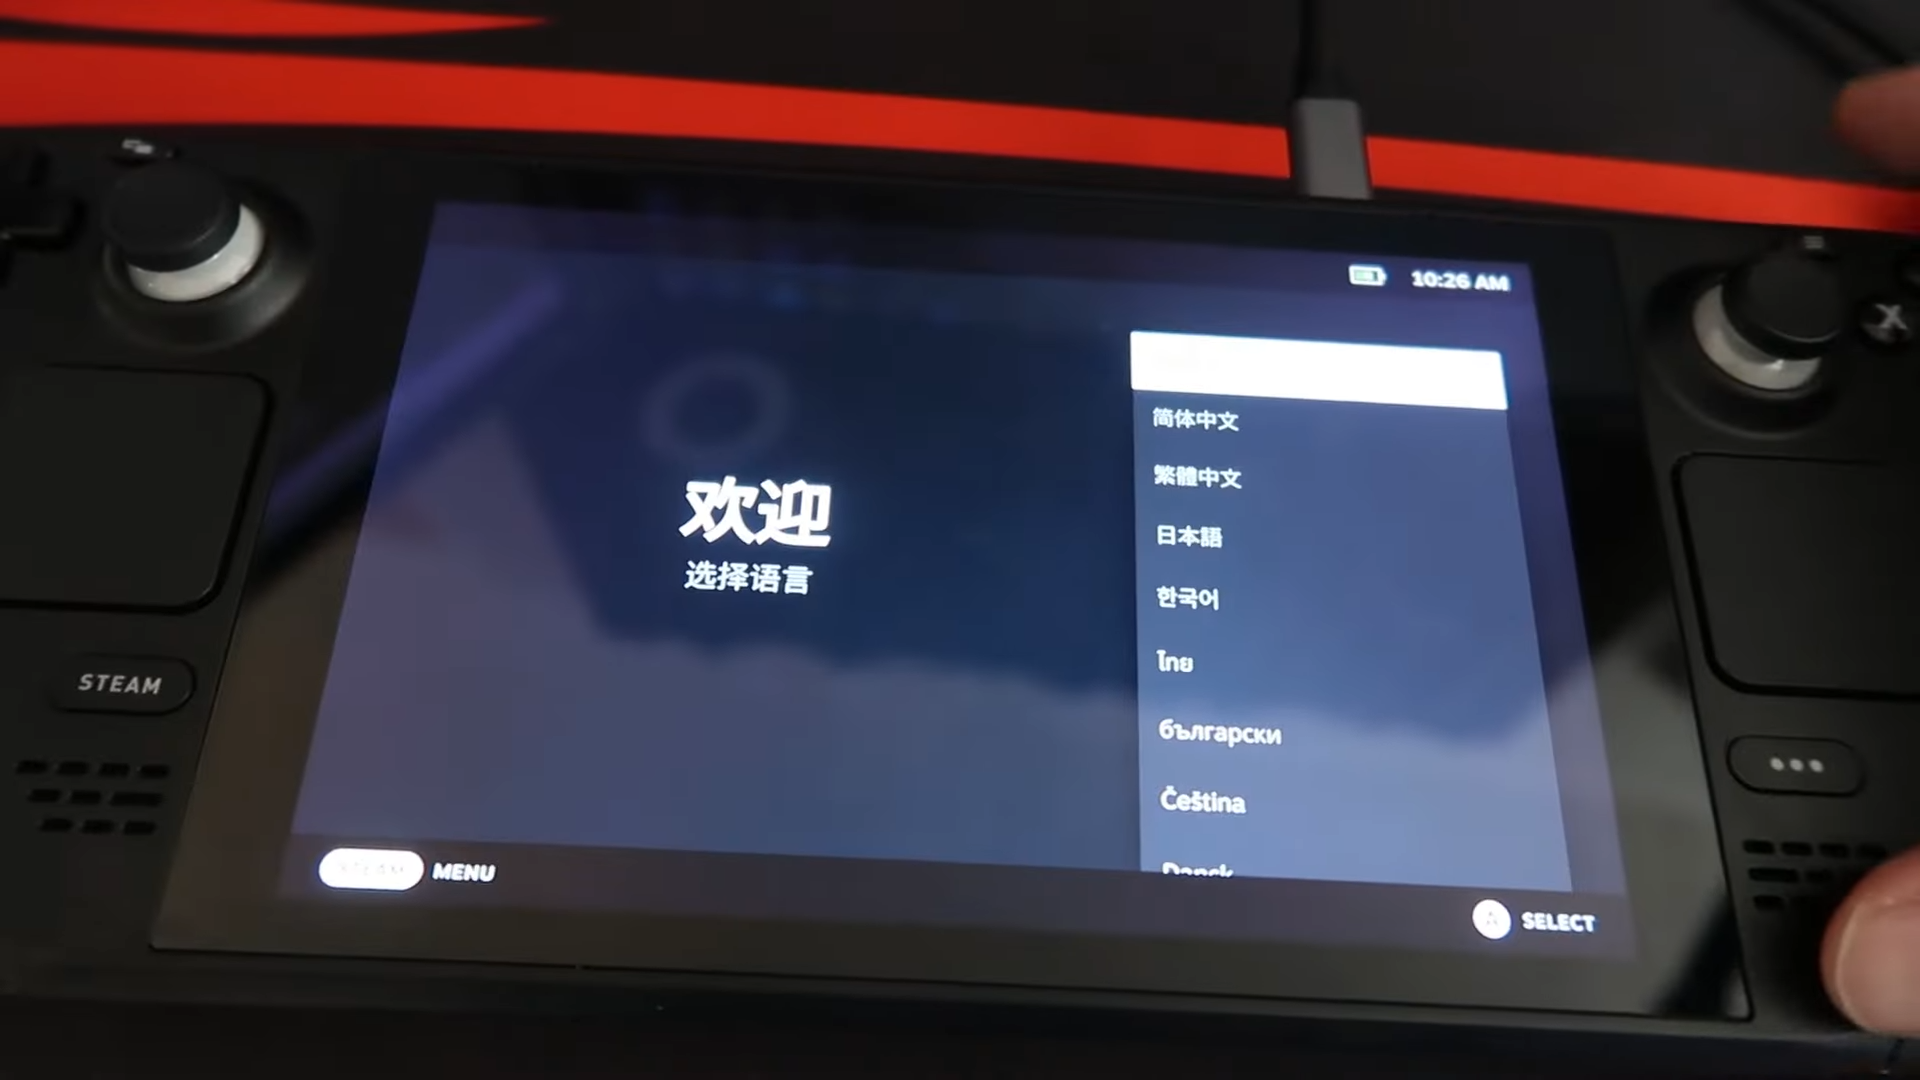
Now while everything may seem peachy thus far, we may run into some hurdles after this process. SteamOS will begin with the usual Language Select option. Select your respective language on the Deck, then Sign into your Steam Account. It will then verify your installation and if all goes well, congratulations, you have restored SteamOS onto your Deck successfully.
⚠ TROUBLESHOOT: If your Steam Deck ends up in an endless loop where it continues to verify your Installation, Shut down the unit completely, wait twenty seconds then boot the unit back up, sign in again and wait for the deck to take you right to the main menu. If the problem persists, then repeat the above troubleshoot but if you’re having zero luck with this, then swap out your USB Stick for one that has faster writing speeds and head back to Step 1 and follow the process again.

Now that you have your Steam Deck back to factory settings, I would highly suggest installing a few add-ons to the deck such as ProtonUP-QT for stability and compatibility options, Adjusting your Frame Buffer Size for a smoother experience, or EmuDeck to play those classics on the go. You can find a comprehensive guide to do all that at this link.
But that’s it! It’s a simpler process than installing third party operating systems, but that’s nothing out of the ordinary. The Steam Deck is turning out to be one of the greatest handheld devices ever made and I can’t wait to see what it gets up to in 2023. Happy gaming, gamers!
