Totally Wrapped...
Happy Holidays everyone! So if you’re like me and are in the honeymoon phase with your Steam Deck, or have just unwrapped this incredible gift that’s been bestowed upon you this Christmas, then you’re probably wondering what you can do with it besides playing games from your Steam Library. The Steam Deck itself is an incredibly versatile handheld PC device, allowing players to take AAA gaming on the go. While the Nintendo Switch I would say WAS capable of this notion within its primary years on the market, it’s nowhere near as capable of what this portable powerhouse can demonstrate. For those that simply purchased the platform to play their Steam Games, congratulations you don’t need to read any further. Enjoy. But for anyone that wants to truly unlock its potential, here are 5 things you SHOULD do with your brand new Steam Deck.
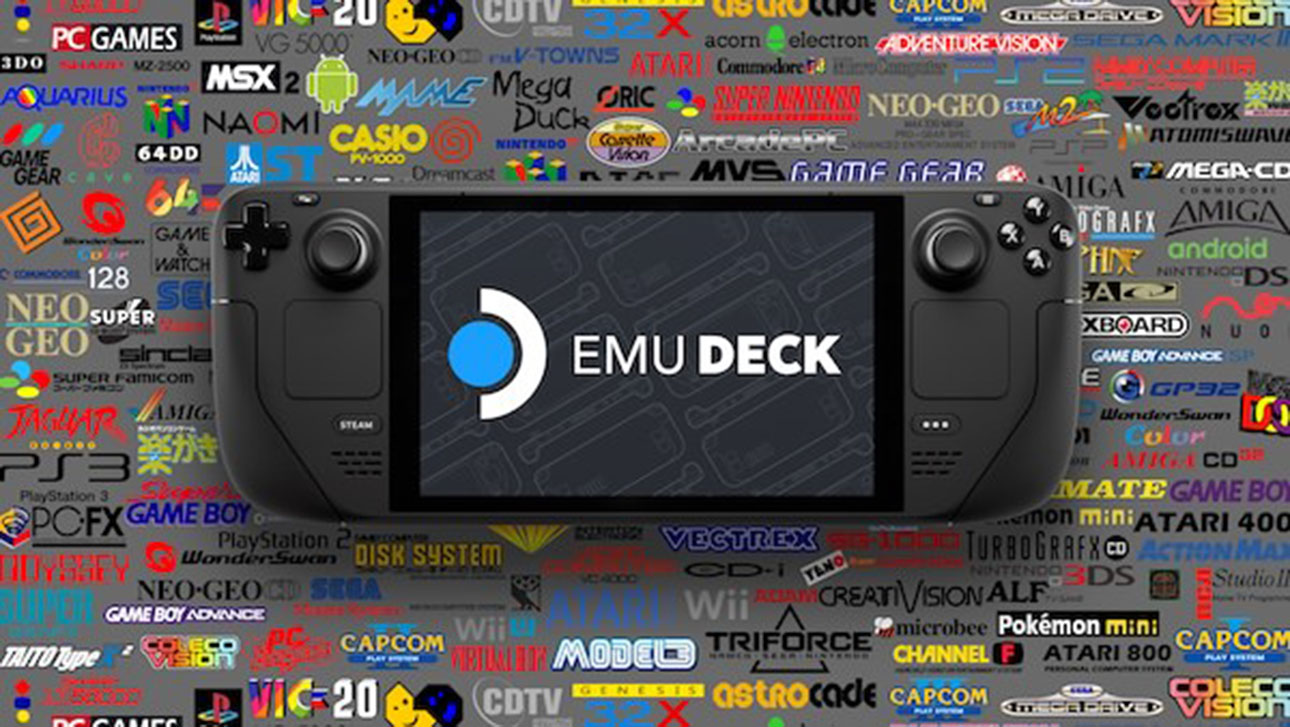
Emulation. A dirty word to some – *COUGHNINTENDOCOUGH* – but for others, it means preservation. Solely keeping the heritage of some extinct genres alive through modern means of delivery. EmuDeck allows players to install all available, and stable emulation software in one swoop with pre-configured options that allow a seamless installation process. From The original Atari, right up to modern platforms, you can experience it all at your fingertips. Simply head to EmuDeck.com from your Steam Deck’s Desktop Mode, select “Download” from the top, paste the file to your Desktop, run the executable and follow the prompts. From here, you will need to designate games to their respective folders within the location you chose to place it. After that’s all done, you may run EmuDeck or Emulation Station from SteamOS and enjoy your classics.

Proton is Steam’s answer to running .exe Windows based executable files on Linux. The tool itself is grand for people that need it for titles that aren’t specifically supported, but stand as limited to what Valve to on offer for platform owners. ProtonUP-QT can rectify this, by installing custom versions of the Proton tool known as Proton-GE, developed by its namesake GloriousEggroll. By heading to Desktop Mode, then opening Discover on the Taskbar, you can search for the app and install it. From there, open it up and select “Add Version”, then from the Compatibility Tool drop down, pick Proton-GE. I would advise installing GE-Proton7-20 to GE-Proton7-45.
Depending on the game you run, it may need a specific version but it helps titles like Dragon Ball FighterZ – which isn’t compatible with the Steam Deck – to (partially) run its single player modes. To utilise Proton-GE, in SteamOS go to the individual game’s properties and select Compatibility, check the “Force the use of specific Steam Play compatibility tool” option then choose whichever Proton-GE tool you just installed. If a game doesn’t boot right away, give it a few moments or try another version. It’s not guaranteed to work, but I’ve had more luck than loss through the process. It’s also a great way for developers wanting to test their own titles, but are struggling to get their game to boot on the Deck.
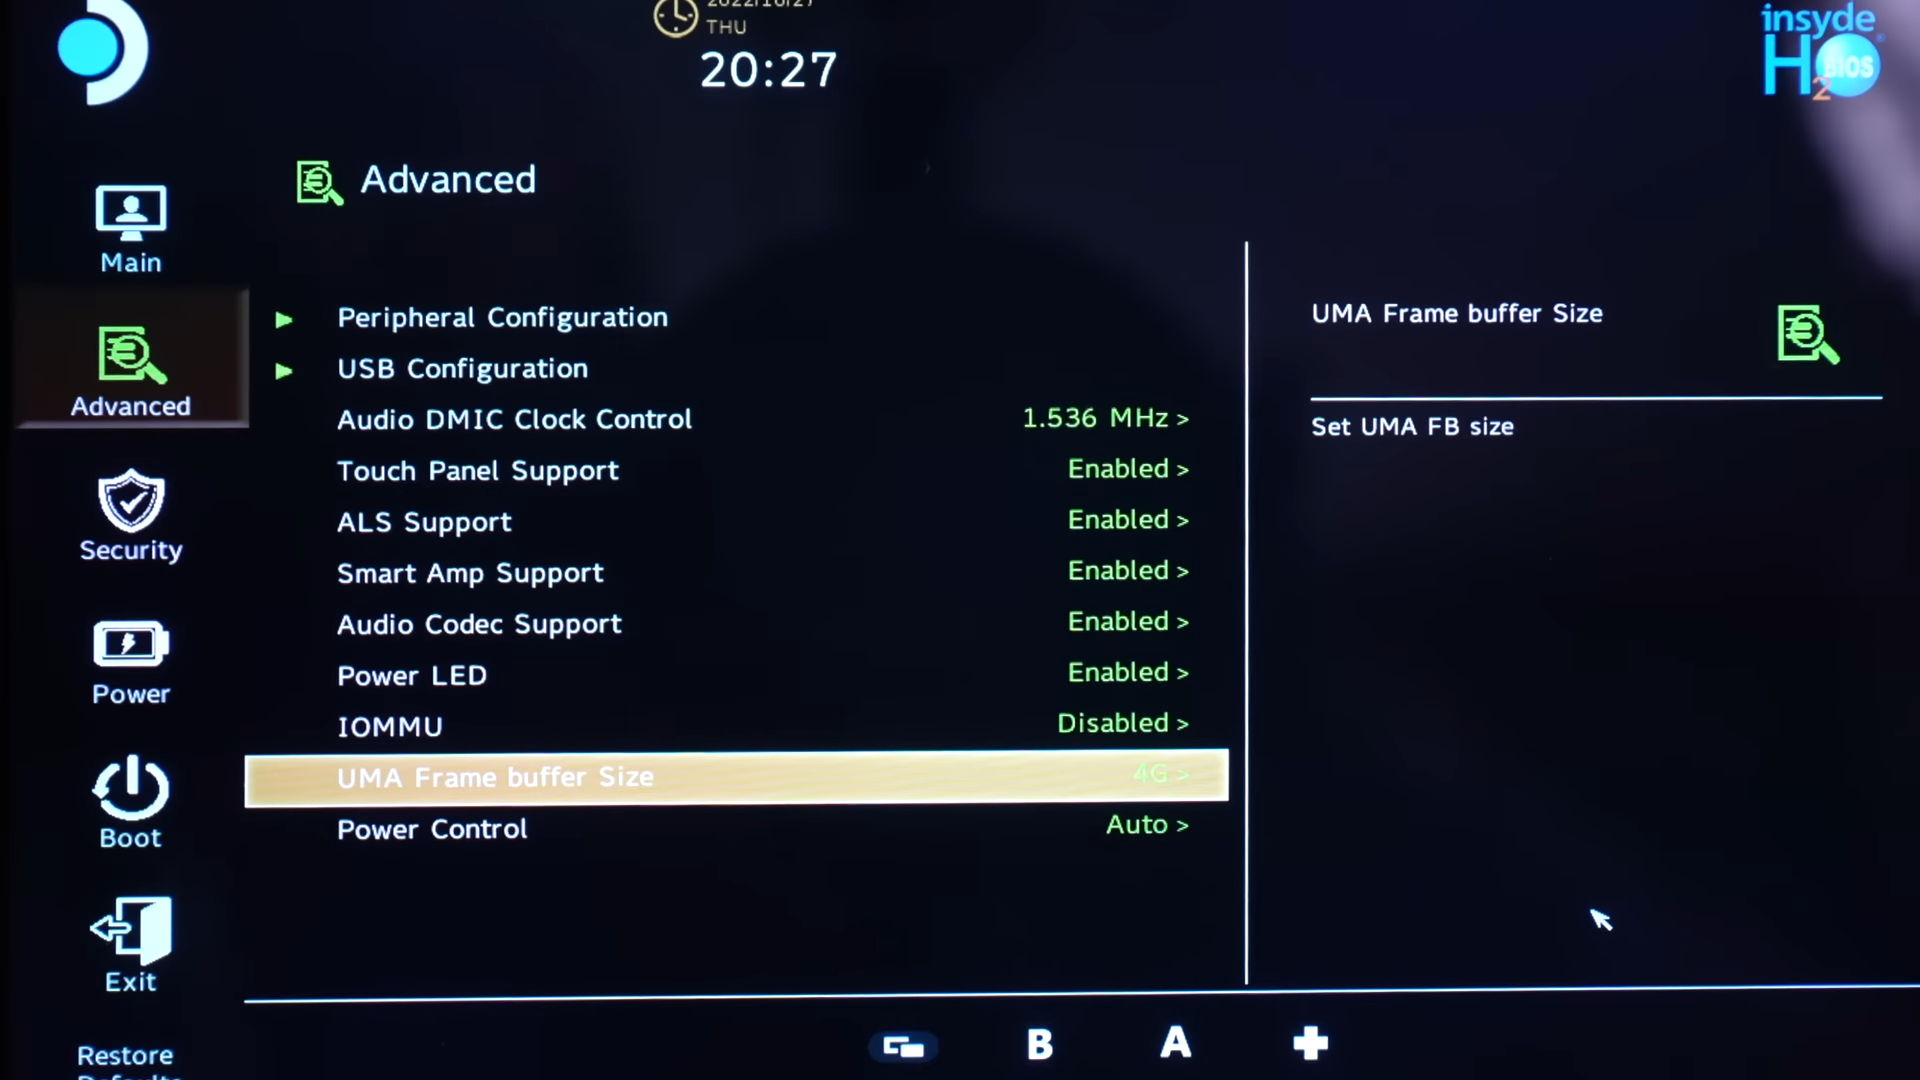
So regardless of how powerful this piece of kit is, Valve have made the questionable choice of designating 1GB of its APU’s cumulative power toward its internal GPU, while 15GB are given to the CPU. If you ask me, totally unbalanced for what players would want out of the platform itself. This is totally optional, but definitely recommended to do. First thing you need to do here is to completely shut down your Steam Deck until the screen turns black, and everything is off. Then hold down the Volume Up (+) atop the deck, then press the power button as you would turning on the unit, you will boot into the BIOS. Keep holding onto the (+) button until you have reached a screen with four options. Here select “Setup Utility”, then select “Advanced”, then “UMA Frame Buffer Size”. You will have a list of five options but whatever you do, don’t choose anything below 1GB. If anything adjust it directly to 4GB. Select “Exit” From the bottom left and Save your changes. You will immediately see a performance boost in not only your Games Library but your system’s frontend.
This one is plain and simple, and is a tale as old as time – at least for those in the know. This action should be done out of the box or at least fresh in-hand after initial boot. Drain your battery until the device shuts itself down, then set it on charge. This will in-turn, calibrate your unit’s battery capacity, which can be seen from the Right hand menu bar under the battery option. This will prolong its lifespan, and keep its health on the up for quite a number of years. If you notice the Battery at all begin to drain too fast, perform this calibration again and it should sort it out.
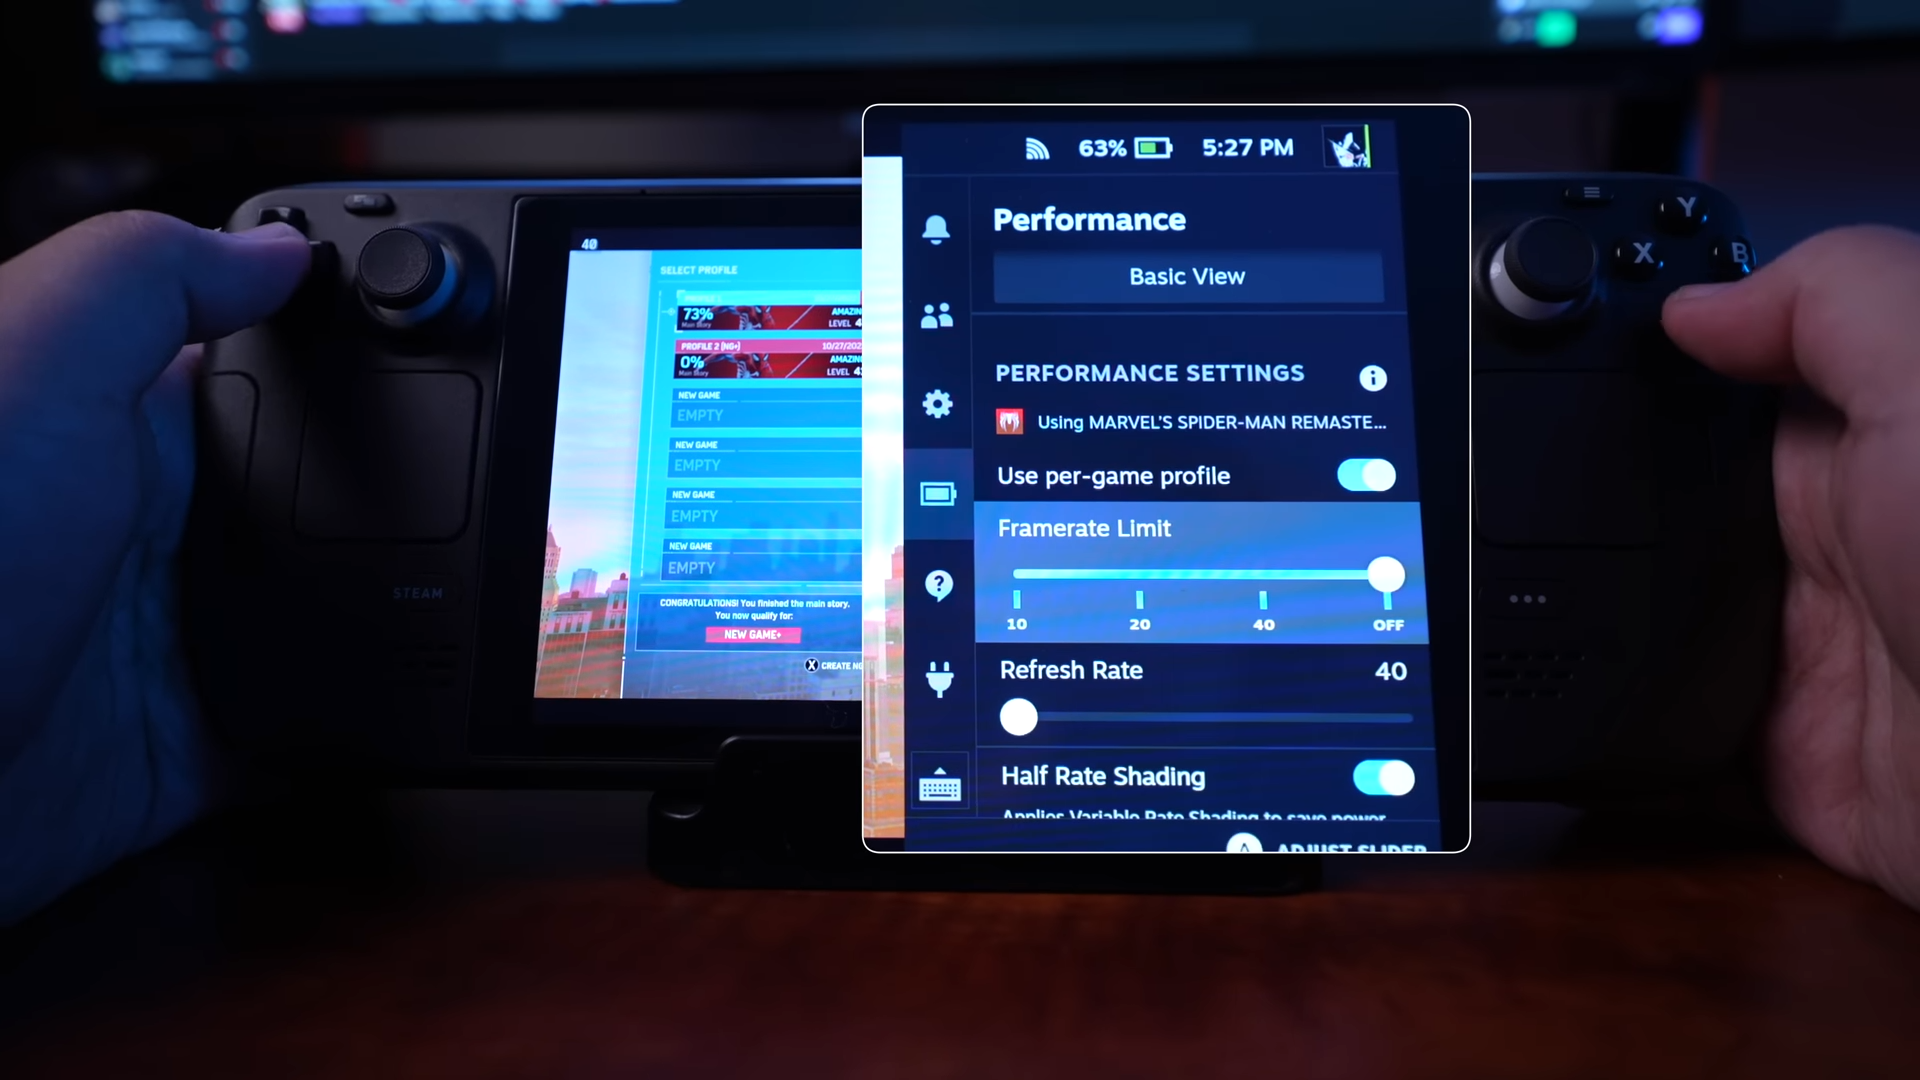
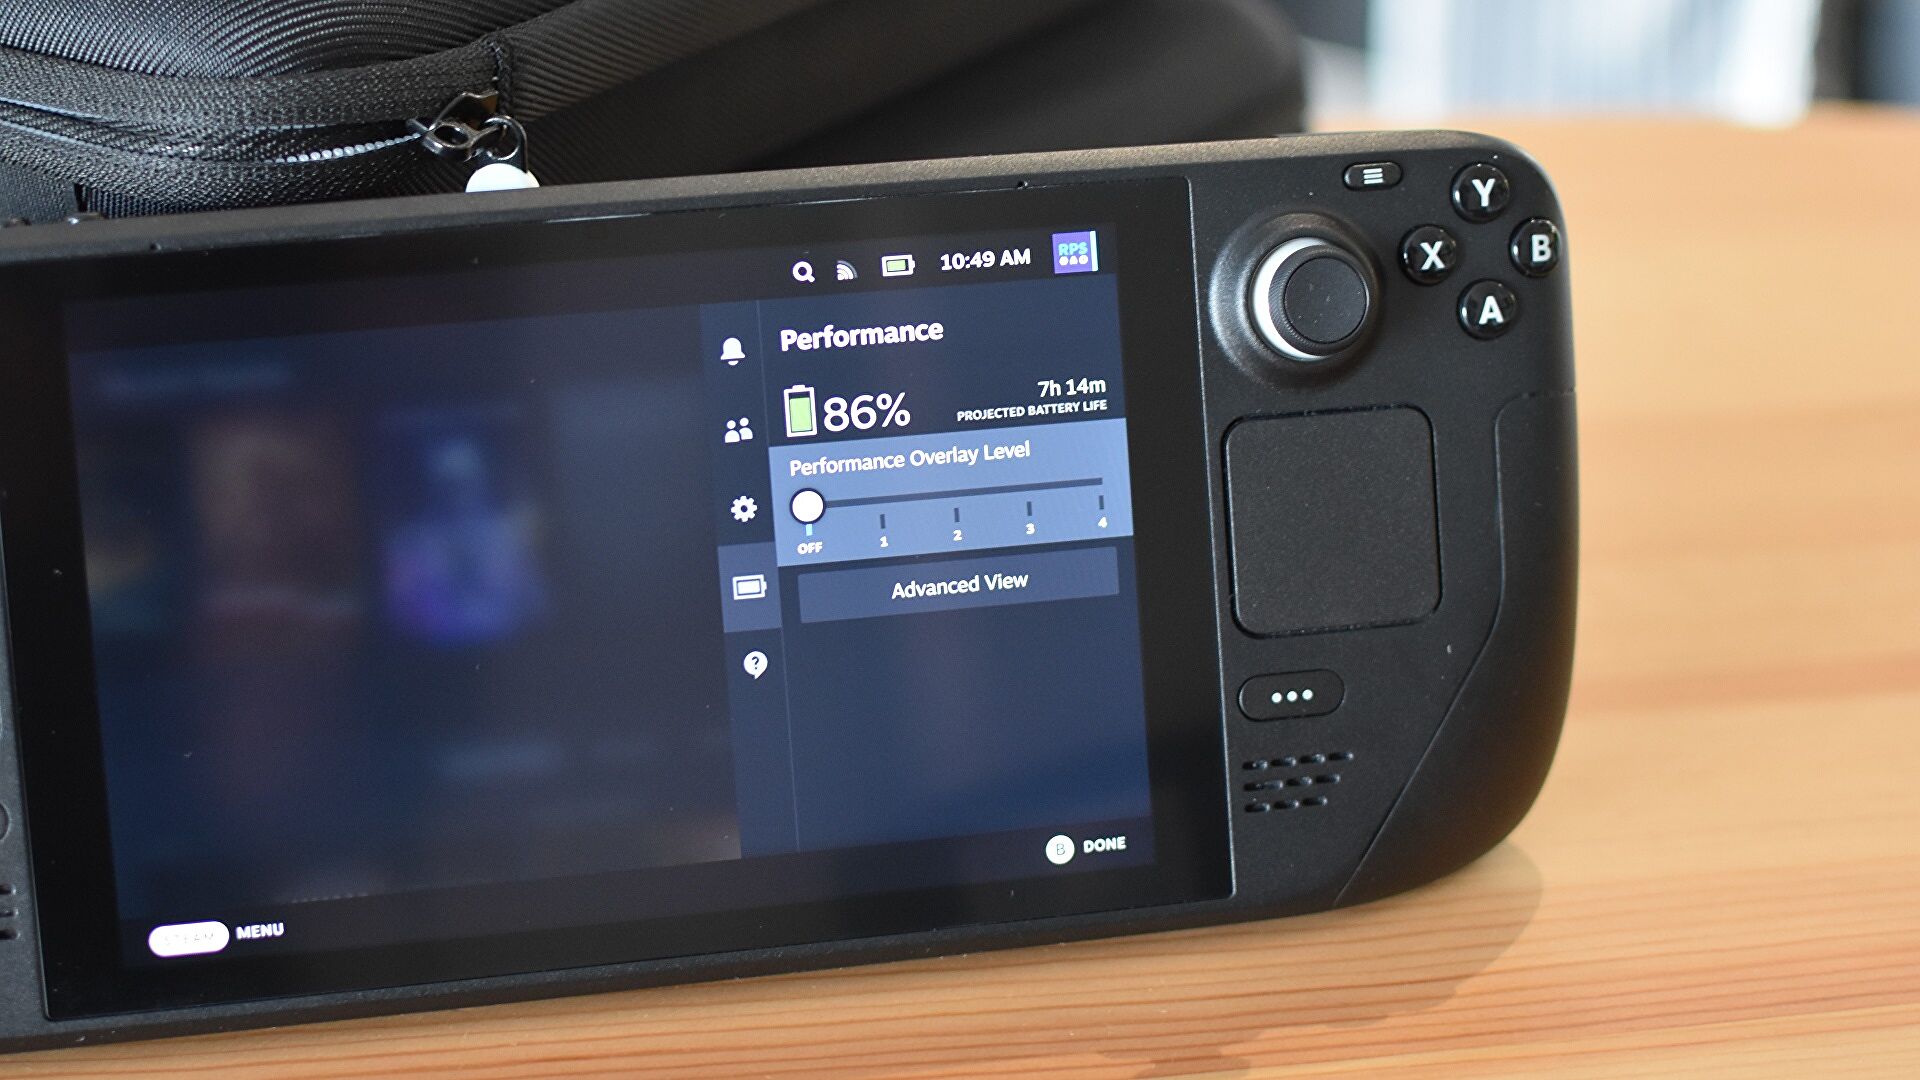
Yes, it’s a tool that should be utilised as it’s granted for those that want to get the most out of their Steam Deck’s playtime. Let’s face it, the unit’s Battery life can be abysmal for some titles, especially ones that are as graphic intense as Marvel’s Spider-Man: Miles Morales, or Final Fantasy VII: Remake Intergrade. On the Right hand menu that can be activated by pressing the three dots (•••) adjacent to the STEAM button, scroll down to the Battery option and activate “Use per-game profile”. Here you can tweak respective options for certain titles, but one I would highly suggest is to drop your Refresh Rate from 60FPS to 40FPS. This will save you some battery life – we’re talking an hour or more depending on the game, and isn’t a visibly noticeable downshift to your game’s performance.
Alongside this, you may also tweak your Thermal Power Limit and the unit’s GPU Clock on each game by scrolling further down and enabling each of these options. I personally suggest under TDP, having the Wattage set to 11, while Setting a Manual GPU Clock Control of 1100. This will keep the unit somewhat cooler and won’t demand the fan from kicking in real hard. Anyway, I hope these tips have helped you and your shiny new Steam Deck. Enjoy!